Well this stuff really is tricky, espeically the first time around. It will take some more practice but I think I can get it down. Here are a few of the pictures of what I made with the bottle caps and resin. :)
Well I am using resin for the first time tonight. I have decided to make the bottle cap charms for bracelets, key chains, etc. So far so good but man resin does not smell very good. Here's to hoping I do not get a massive headache. If I got the parts mixed just right I should have some bubble free charms by the morning. I will post pics of the final project.
Here is a quick step by step guide for creating your own shabby chic lamp shades from spare fabric you might have laying around. Pictures will follow below. Enjoy!
I also custom make these so if you would rather not do it yourself just let me know and I can make you one!
1. Pick out an old lamp shade you can deconstruct. Great places to find cheap ones with good "bones" would be a thrift store, junk store or resale shop. You will need to remove the old shade and get it down to the bare metal structure. Mine is in two pieces here.
2. Second pick out your fabric scraps. For this project mine were 18" long by about 1.5" wide. I used about 27 strips. This is to make a small lamp shade that hangs down about 8". So keep that in mind when starting to measure your fabric. Just play around until you find the right length to cut, then cut them all the same. I used 9 different fabrics but you could certainly do this with only 2-3 fabrics as well.
3. Once the strips are cut, begin to tie them (single knot) to the top of the shade base and the bottom of the shade base. Slowly work your way around keeping the material fairly close to each other as to not let too much light though when you are done.
4. Hang shade onto your lamp and turn the light on. check to see if there are any holes (too much light coming through) or if any of the material looks too long, etc. Make adjustments as needed. Remember to always remove the lamp shade before trimming or retying fabric for safety reasons.
5. Put final product on your lamp and viola! A new look for your living space, office, etc!
As a general rule i usually do not use a bulb over 40w for any of my fabric lampshades.
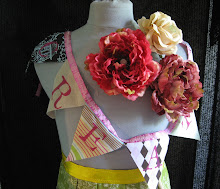
These are a few of my new etsy items I just posted. I will be in the Accessories showcase on 9/23 so mark your calendars! I will have a bunch of new items up before then. Don't forget to visit my etsy shop! EclecticsEtc on Etsy.
I love my grandmother terribly! She is such a huge supporter of my creative endeavors so each month I try to make something special for her and mail it home. I love creating something for just her and then making the bag and gift wrap and a handwritten card to go with it. What could be a better gift? I know that's what I would want in a gift. I hope she likes it!
It is a reclaimed gold tone chain, gorgeous fall butterfly brooch with brilliant coloring and a home made gift bag complete with gift tag and handwritten note.
I'm a simple girl with a full time corporate job. My creative side comes bursting out at night! I like to try different and random things with really no rhyme or reason to them. That's why my shop name has "eclectic" in it, because that is definitely what I am. I am also constantly making things for people as gifts and "just because" items to brighten their day. I hope my items can bring a little of joy to your life as well!


